 Buy Me a Coffee
Stand back and brace your routers, it's a PHOTOBLOG!
That's right, dear readers, I have done some things. First of which was shopping for a shoes, and some other bits and bobs that cost a lot of money. [Donate today and you can fund this author having food to eat during WWWC5!]
But first, the twiddly bits:
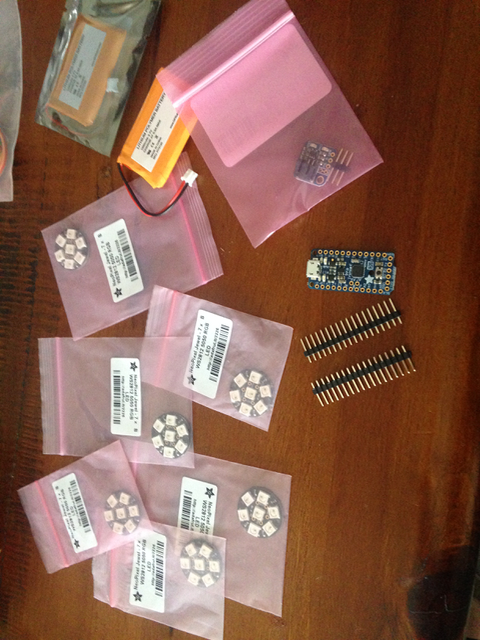 [Shown here: two Adafruit(tm) circuit boards, six 7-micropixel LED 'flowers' and two rechargeable battery packs]
These were ordered by post. The wires, wire strippers, solder and soldering iron had to be purchased locally at unbelievable expense.
The larger of these two boards is shorter in length than a AAA battery, and almost twice as wide. It also contains the Micro-USB port through which the program and the recharging happens.
The smaller board is the primary means by which the battery power reaches the rest of it.
I do recall having to cut the connection between the power out and the power in part of the boards. We finally had to rely on Beloved's ceramic micro-knife to do the job.
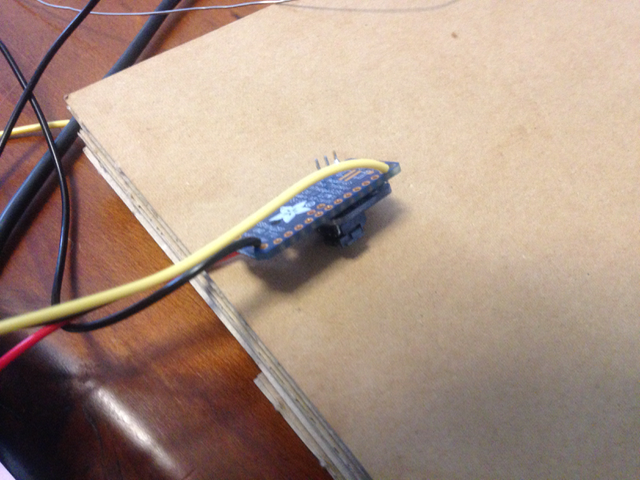
 [Shown here: the assembled Adafruit(tm) circuitry, one soldering away from completion]
I learned how to solder things together! Yay! I also had tremula because my medication does not leave me alone. Fortunately, years of putting jewellery together has taught me well.
[What is it with me and doing delicate craft work when my hands are shaking like a wet dog?]
The cardboard you see is a simple method of getting the circuit board to stay still. Those little tines you see with the kit in pic 1? those are very good at piercing softer, but still firm things like corrugated cardboard or styrofoam. Beloved tried, but they hadn't quite figured out that one needs to work out which way the corrugations are going to get a good piercing. I did. Nerny nerny ner ner.
Now picture this for one second. I'm probably two downshifts away from clinically blind. I have wicked tremula because nebuliser doses are the gift that keeps on giving. In order to see what I'm doing to this thing, I have to take my glasses off and get my face to within 5 centimeters [2 inches] or less of the working area. Holding a hot rod in one shaking hand and a melty piece of wire in the other.
And - guaran-firkin-teed - Beloved has to poke their fingers in at the last firkin instant to make sure there's flux or the wires are going the right way, or I'm holding the freaking soldering iron correctly.
There was a lot of shouting during the learning curve. Especially since I had to put my glasses back on to see the gestures Beloved was making, then take them off to try my go. Then put them back on to see the gestures...
For the record, I have less shakes if I have something to lean on.
 [Shown here: The heart of the heart, upside-down]
I had to solder another red wire to the bottom of the board, here. Another exercise in exasperation because of "you're doing it wrong" with Beloved. On the upside, I learned how to do really neat solder jobs.
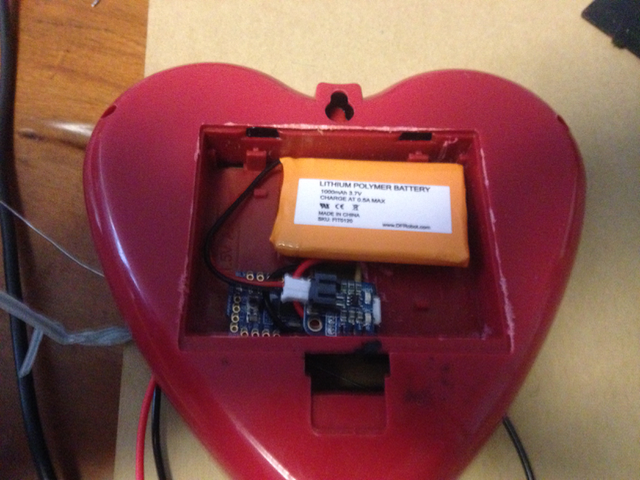 [Shown here, the brains of the heart and the battery inside a place meant for four AA's]
Sharp-eyed readers will note that we didn't plug the battery in, yet.
Now, if you get a kiddies' battery-powered night light like one of these, you'll probably notice that there's a lump of useless plastic between pairs of batteries. This was sincerely in our way. I tried filing it down to no great reward [hence the scuff marks around the battery port]. Finally, Beloved took a hammer and chisel to it [I shit you not] and used those to cut that nonse out.
As you can see, it all fits very snugly.
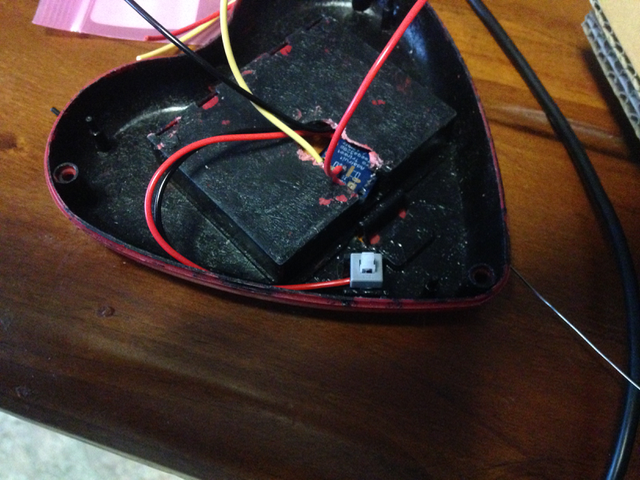 [Shown here: Heart interior with on/off switch installed]
Beloved swears blind that they ordered a switch. One was not present in all our technoscrattle. Fortunately, I never throw anything out, and I had the original switch from the basic night light unit.It was a relative doddle to exise the old wires and solder on the new ones.
We would later be taming the errant wires with hot glue.
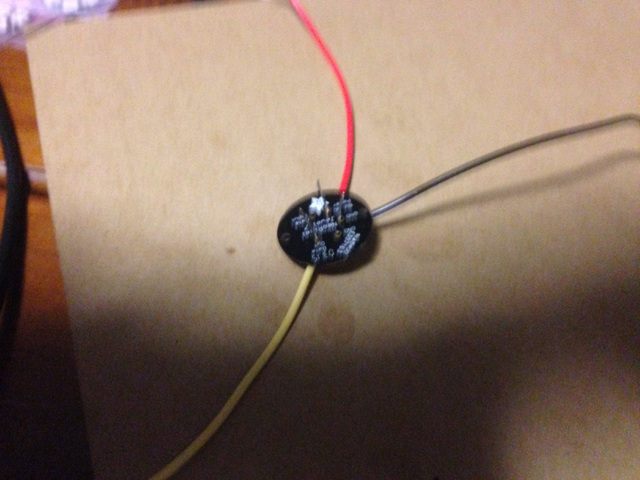 [Shown here: One of the 'flowers' with the wires on]
Apologies for the blur. I tried my best, but - tremula.
Beloved arranged the wires because I am scared of breaking things like this. Besides, I was doing all the soldering and I couldn't see much past the end of my own nose.
After the first few, I kind of got into the rhythm of it and I started to get fussy about the quality of my soldering.
Each upstanding wire was then snipped short to just past the soldering. We're making this thing fuckup-factor-proof. Or so we thought.
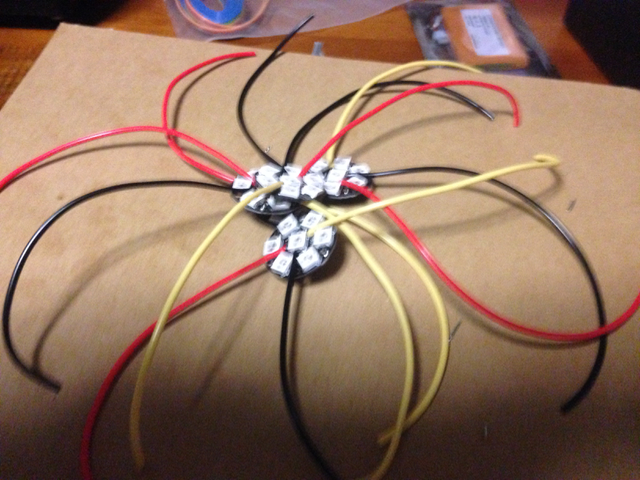 [Shown here: a whole bunch of wired-up 'flowers']
One of these has a power output wire in the wrong firkin place. Can you tell which one it is? Neither could we. Not until almost the last instant.
The procedure for fixing a firked-up 'flower':
- Apply soldering iron to solder and take out the wrong wire
- Put the wire in the right place, this time, dummins
- Solder that mofo into place
- Whilst juggling flower, wire, and soldering iron, heat up the firked hole and insert correct wire [It took us five goes!]
- Fix the solder again
It was really nerve-wracking because it was a four-handed job. I had the shakes, Beloved had the shakes, and neither of us were certain we had anything in the right place. And I'm still inordinately proud that we did it anyway.
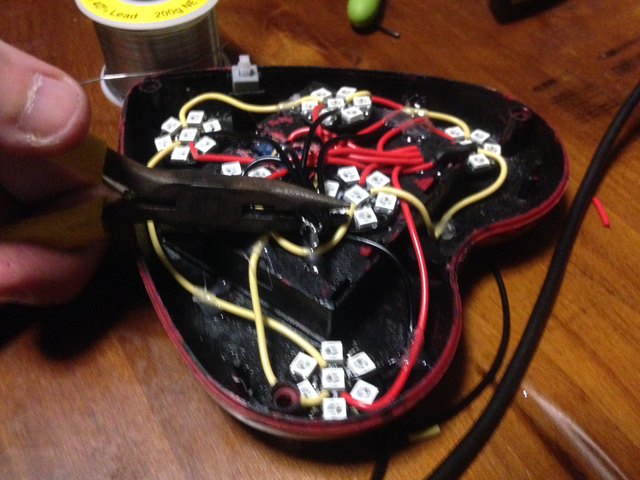
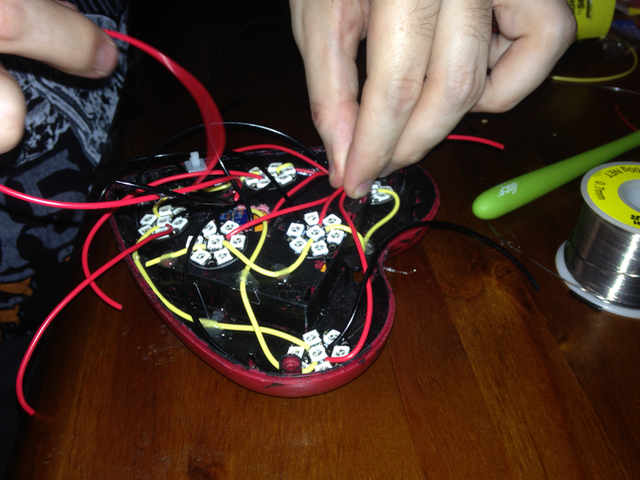 [Shown here: expert wire-juggling]
We connected the data wires [yellow] first. In the process, deciding and finalising where the micropixel 'flowers' went.
We placed from most difficult [the 'flower' in the upper right corner of the heart as you face it] to least difficult to bugger with [the ones on the battery casing]. The result was a sort of clockwise circuit, finishing with a dead output wire.
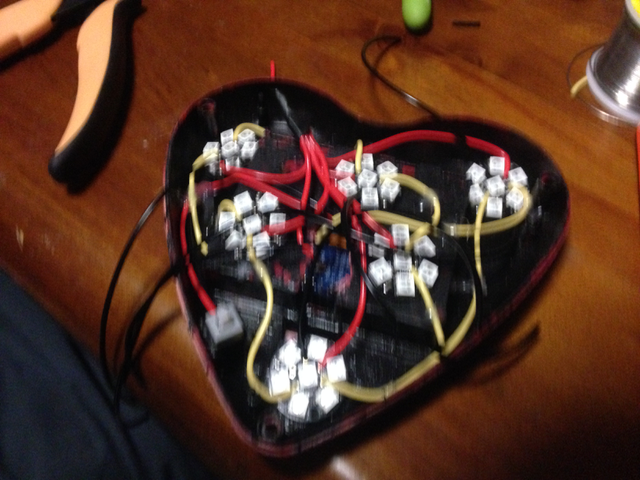
I was shocked and amazed that the solution to the red and the black wires was "solder them together". And after the first time, we rejuggled the wires after getting all the stripped metal tinned.
Tinning, for those not in the know - is the process of adding solder to stripped wires so that nothing naughty happens later.
After the ends were all soldered together, we applied heat-shrink tubing to the exposed end, and I got to tickle it with a soldering iron.
 [Shown here: completed red wire blur]
Taken just before I applied the hot glue gun to nail that sucker down. The hot glue gun got a lot of work, last night. We ended up leaving it on, and let it dribble into a spare cardboard box that we had lying around.
 [Shown here: black wires post-soldering]
Now, while I feel we're at pro-levels by now - I don't think we'll be volunteering to make any more glittering rainbow hearts any time soon.
Yes, I'm rather proud of my work. I've gone from not knowing shit about putting electronics together [seriously, I firked up the easy-peasy Crystal Radio set. I regularly fluffed up circuit boards in school] to knowing some jargon and a few tricks to boot.
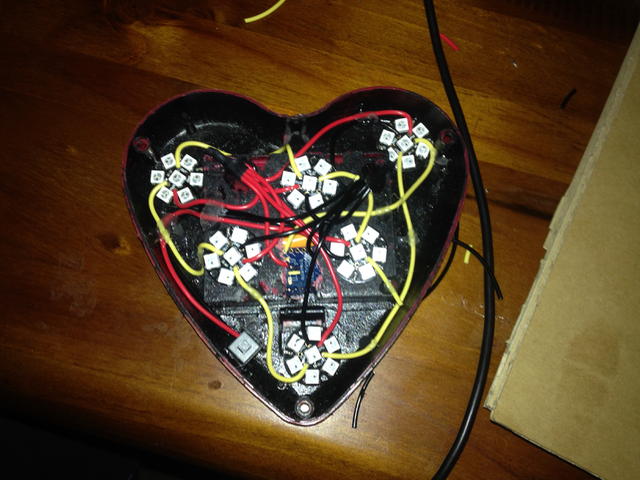 [Shown here: the finished product]
I still have to paint the red casing gold. I plan on using tinfoil, baking paper, and sticky tape to make sure the pixels don't get any spraint on them.
I may yet enlist Beloved's help for that, too.